
Canva Review — All the Pros and Cons
In this detailed Canva review, I’m going to look at all the key pros and cons of an increasingly popular app for designing visual materials. Is it right for your business? Or should you stick with a professional desktop app like Adobe Photoshop?
What is Canva?
Canva is a graphic design app that aims to let you design visual materials without needing extensive graphic design experience. Typically, the tool is used to create social media graphics, simple videos, presentations, slides, posters, and other visual assets — and a wide range of customizable templates and royalty-free images is provided to help users do so easily.

Unlike traditional graphic design tools like Adobe Illustrator and Photoshop, Canva’s learning curve is designed to be very gentle. This means that its feature set is much more basic than these sorts of ‘pro’ solutions — but its pricing is considerably lower than theirs too.
Launched in 2013 by technology entrepreneur Melanie Perkins, Canva is now a hugely popular solution for creating designs, boasting over 75 million monthly active users in over 190 countries. Over 7 billion designs have been created with the tool and 2,500 staff members now work for the company.
How does Canva work?
Canva can be used either in a web browser or as a downloadable app (for Mac, PC, Chromebook, iOS, or Android).
It gives you three key things to help you create your design:
- templates — pre-designed layouts that you can use for a variety of applications
- ‘elements‘ — royalty-free photos, videos, and graphics that you can add to your Canva templates
- a drag-and-drop editor that lets you move elements around a template.
Additionally, Canva provides controls for editing the typefaces and colors used on a template; it also lets you create custom templates.
The idea is that you simply pick a template, drop some content into it, make a few tweaks and then export your design for use online or as a printed item.
But how easy is this in practice?
Ease of use
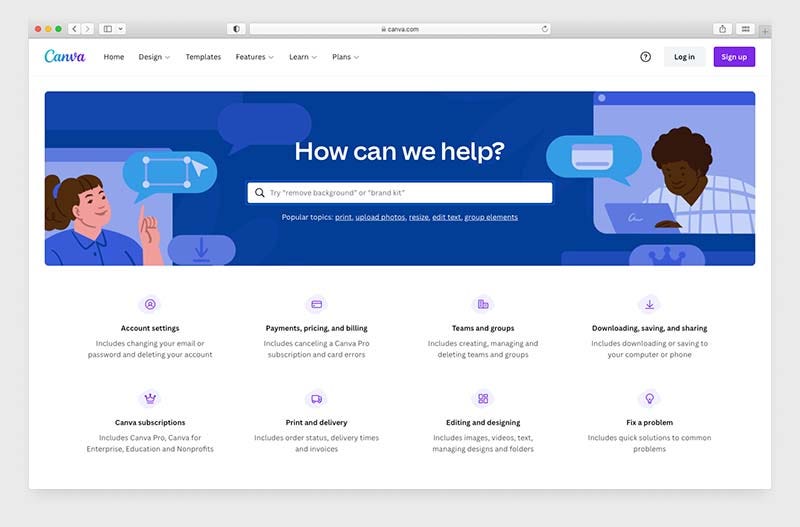
When you log into Canva, you are presented with a question: ‘What will you design?’

You can answer this question by entering design ideas in the search bar provided, or clicking the icons underneath it to access suggested layouts for presentations, social media posts, videos, printed products, and more.

Either way, you’ll end up with a wide range of templates to choose from. You can pick one of these as the starting point for your design.

From there, it’s a case of editing the template so that it meets your needs. You can do this by clicking on one of the design’s elements (text, visuals, etc.) and using the controls that appear above it to change that element.
Alternatively, you can replace the placeholder content with your own images or text (or add additional pictures and copy).
To add an image, you can either search for an element from Canva’s ‘elements’ library (hundreds of thousands are available, and I’ve yet to come across a search phrase that isn’t adequately catered for).
You just click on an element to add it to your design, and you can resize it easily to suit your purposes.

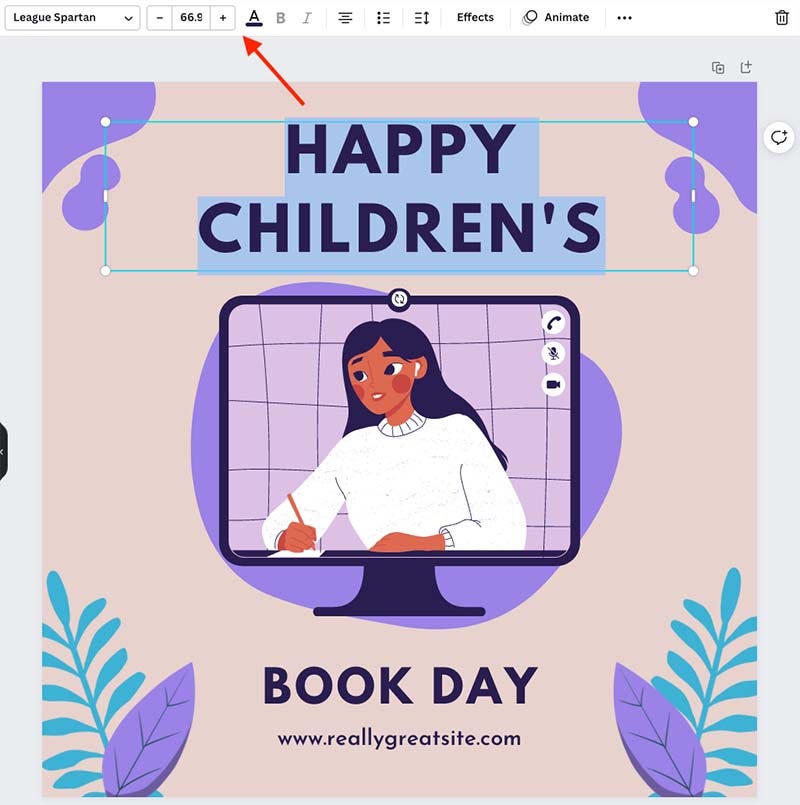
Where changing text is concerned, it’s simply a case of overwriting the existing copy, or using the ‘text’ tool (pictured below) to add new headings or body text.

Ultimately, the process involved in creating a design in Canva is simple and its interface is extremely user-friendly — anyone who’s used a word processor or a simple graphics tool will find the learning curve fairly non-existent.
(It’s also worth pointing out that the fact that Canva’s interface is available in over 100 languages helps matters from an ease-of-use point of view too).
So, it’s fair to say that Canva meets its goal of making graphic design accessible to non-designers.
What about adding your own assets to Canva?
Although a key aim of Canva is to give you everything you need to create designs all in one place — photos, videos, typefaces, templates, etc. — it also lets you import your own assets too.
This can be done via its ‘uploads’ section, which allows you to import images, videos, or audio to your Canva account. (It also lets you record a video of yourself).
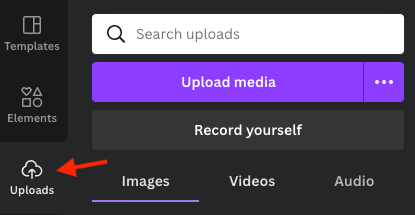
Once you’ve uploaded an asset, you can simply grab it from the ‘images,’ ‘videos’ and ‘audio’ tabs provided and insert it into your projects.
You can also add your own custom fonts to Canva — I discuss this in more depth shortly.
Photo editing options in Canva
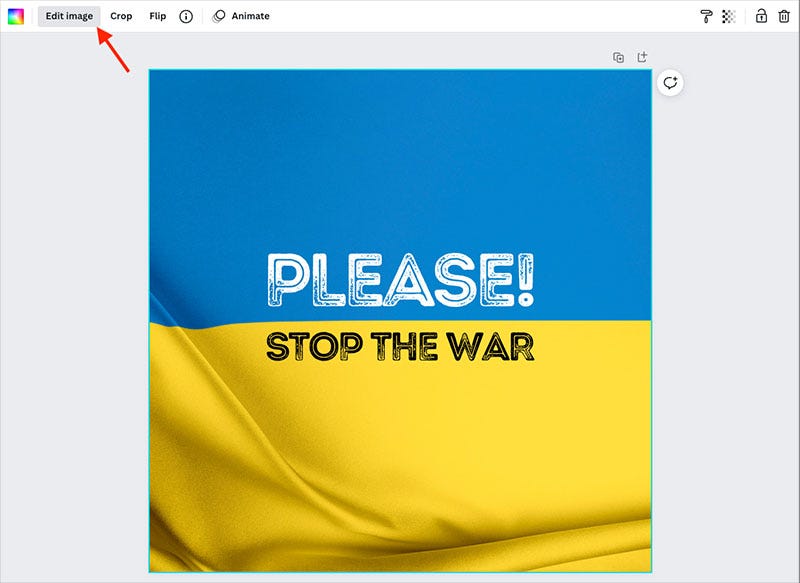
Once you’ve added a photo to a design, you can tweak it easily using Canva’s photo editing tool (you just click on a photo and then an ‘edit image’ button to do so).
This gives you access to a set of simple controls that let you alter that image’s appearance in various ways. Sliders to adjust brightness, contrast and saturation are provided, and you can also make use of Instagram-style filters.
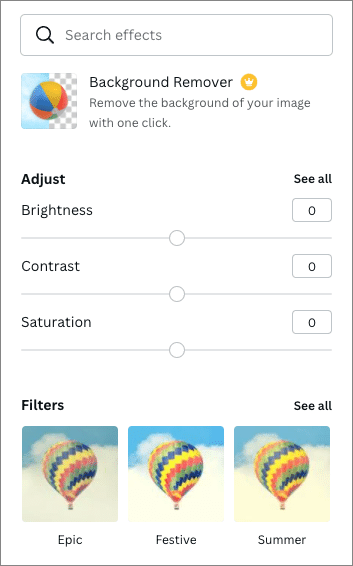
There’s also a handy ‘background remover’ tool that lets you remove/replace the background from photographs. This is particularly useful for creating headshot photos for websites, or thumbnails for YouTube videos.
As with much else in Canva, the image editing controls are very much of a ‘cut-down’ nature. But they feature the tools that are arguable of most relevance to the majority of users.
Editing videos in Canva
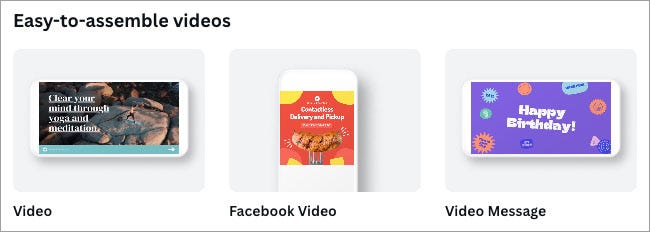
In addition to letting you create ‘static’ designs, Canva lets you create videos too. The process for video creation works in a broadly similar way to designing static content — you pick a template, tweak it, and add clips to your video as necessary.
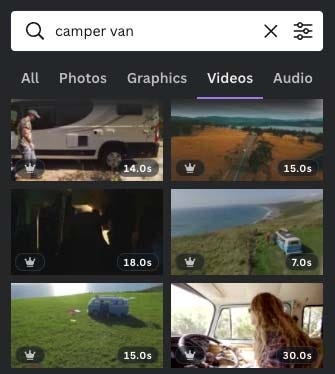
Clips can either be imported to Canva’s uploads section, or you can add them from its extensive library of stock videos (which you’ll find in its ‘Elements’ section). Alternatively, you can use your webcam to record videos directly into Canva.
Once you’ve got your video clips in place, a timeline lets you drag and drop them into place, trim them and create your final edit. You can also add audio to your video from a royalty-free library of over 25,000 pieces of music / sound effects.

Although the video creation functionality on offer from Canva is nowhere near as extensive as that which you’d find in a dedicated video editing application — you won’t be able to play with a wide range of transitions, or professionally grade your video content, for example — it’s extremely usable, and the built-in stock videos and audio libraries can help users save a lot of time and money.
How to access a 45-day free trial of Canva Pro
Canva normally makes a 30-day free trial of the ‘Pro’ version available.
However, for a limited time only, you can access a 45-day free trial of Canva Pro here. This gives you access to all Canva’s premium design tools, along with a huge library of stock images, graphics, video, and audio.
LEARN MORE >
Creating charts in Canva
Although Canva is often thought of as a go-to tool for creating social media graphics, it gives you some really useful (and often overlooked) features for creating charts and graphs too.
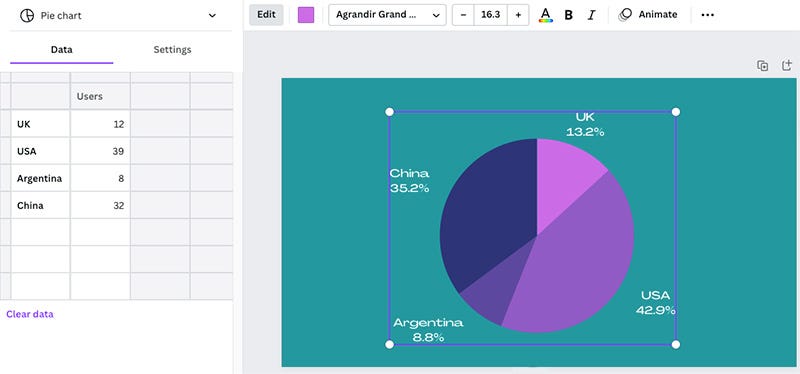
You can create up to 11 different types of charts using Canva, including bar charts, line graphs, pie charts, histograms, and more.
The feature is extraordinarily easy to use — you simply enter your data into a table on the left-hand side of the Canva interface, which Canva then automatically turns into a chart or graph (see screenshot below).
These can be exported to a variety of file formats, or embedded on websites via a code snippet (the latter method of presentation gives you a way to update your data in Canva and show the most up-to-date graphs on your site automatically).
For me, this is a standout feature of the tool that gives you a really simple way to present statistics in an extremely attractive, on-brand way.
You can learn more about creating charts with Canva here.
Exporting your projects
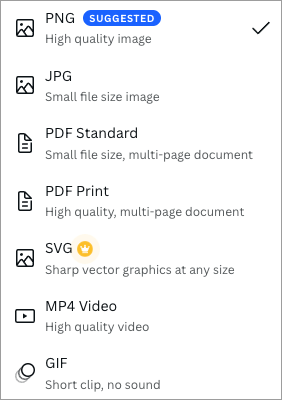
Once you’ve created your design or video in Canva, you can export it to a variety of formats, namely:
- PNG
- JPG
- PDF (low-res and print quality).
- SVG
- MP4
- GIF
To be honest, by comparison to professional design tools, this is really quite a small range of output formats and represents one of the key drawbacks of Canva.
If you use a professional graphics or video editing package, you’ll be able to export your content into just about any format going — but Canva really limits your options here.
Significantly, you can’t export to Adobe Photoshop’s PSD format, meaning that if you want to start a design off in Canva and then send it to a professional graphic designer for enhancement, you’re out of luck. (Workarounds for addressing this situation exist — involving converting files to PDF and using third-party tools to separate layers out — but they’re clunky).
And only one video export format is provided: MP4 (with no options provided to adjust its size or quality).
Now, to be fair, Canva does cover the basics with its output formats, and a lot of its users won’t really need a bunch of additional ones; the key aim of the product is to let people create quickly, and export simply. For most applications, the range of export formats will be fine (especially if you’re using Canva to create content that’s destined to be consumed online).
But some users will miss the flexibility to output in a format of their own choosing.
And speaking of flexibility…
Canva’s Magic Resize tool
A particularly useful feature of Canva is its Magic Resize tool, which lets you repurpose existing designs for different platforms really easily. You can take an existing design, and then use the Magic Resize tool to automatically reformat it to suit different social media channels.
In other words, you can usually turn a blog post banner into a Facebook post image or a YouTube video thumbnail just by clicking a button.
The below video gives you an overview of how the feature works.
Embedding Canva projects
It’s important to note that you don’t always have to export your Canva project to a file format. If displaying a design digitally, you can also embed it. To do this, you simply grab a snippet of code from Canva and add it to your website. Doing so will display your project — but crucially, reflect any changes that you make to it in Canva automatically.
Ensuring brand consistency with Canva
As we’ve seen above, Canva provides users with a lot of tools and content to create marketing materials with — templates, graphics, stock photos, videos, etc. In theory, you could use all of these to design your assets, without needing to resort to anything else.
You could even use Canva to create an entire brand identity — i.e., create a logo in Canva; define a color palette, and choose fonts for your brand from the extensive range provided within the platform.
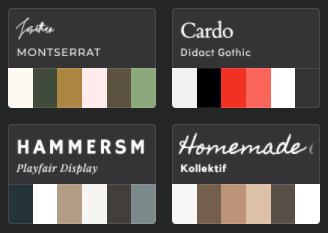
In fact, ‘suggested’ brand identities are available from Canva — color palettes and typefaces.
But in practice, most businesses will need to configure Canva so that they can create designs that reflect an existing brand identity.
To this end, Canva provides you with the option to create a ‘brand kit.’
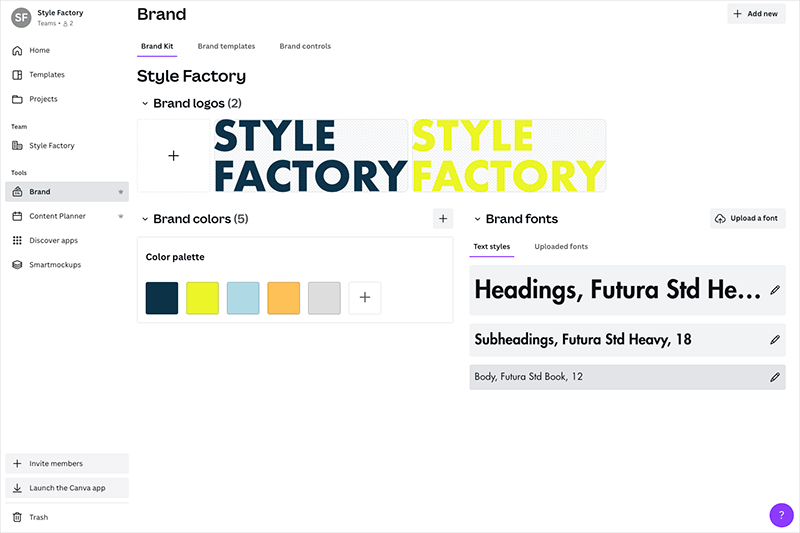
This lets you:
- add a brand logo
- define a color palette
- upload your own font.
On paid-for plans, you can create multiple brand kits (100 on the ‘Canva Pro’ plan, and 300 on ‘Canva for Teams’).
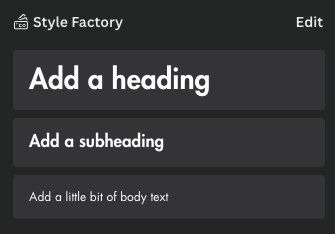
Once your brand kit is in place, whenever you’re creating in Canva, you can apply/add any of these brand assets to your design.
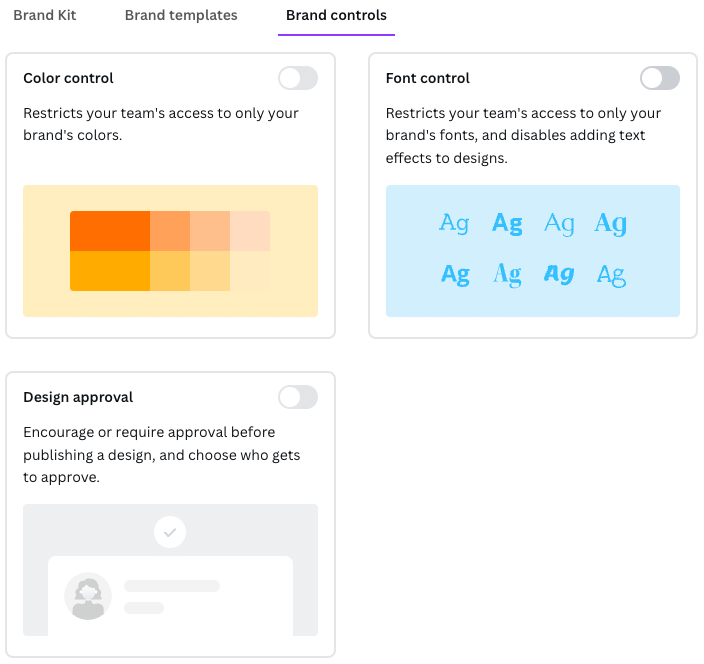
On the ‘Canva for Teams’ plan, you also get a couple of other features in the ‘Brand’ section to help you maintain brand consistency across your designs:
- a ‘brand templates‘ section, where you can create and store reusable on-brand templates
- a ‘brand controls‘ section (pictured below), where you can restrict your team member's ability to use colors or fonts that are not part of your official brand guidelines.
If you have any other brand assets that you regularly use as part of your branding — for example, photographs, backgrounds, etc., these can be added to the ‘uploads’ section of Canva.
To be honest, I’d probably prefer if these elements could also be added to the brand kit (perhaps under a ‘brand assets’ heading or similar).
But otherwise, the brand kit works very well and helps ensure all the materials you create with Canva are firmly on brand.
Try Canva Pro for free — for 45 days
For a limited time only, Canva is making a 45-day free trial of Canva Pro available to Style Factory readers. This gives you full access to all the Canva Pro features and assets for several weeks and lets you export all your designs too. You can access this extended trial by clicking here.
45-DAY TRIAL OF CANVA >
Organizing work and collaborating in Canva
Organizing your work in Canva is pretty straightforward. A simple folder structure lets you create folders that house your designs.
If you’re on a ‘Canva for Teams plan, these folders can be shared with other team members, who can then edit any designs that they contain. This works in a similar way to Dropbox and other sharing services — you simply share a folder with a team member by entering their email address into the folder’s settings.
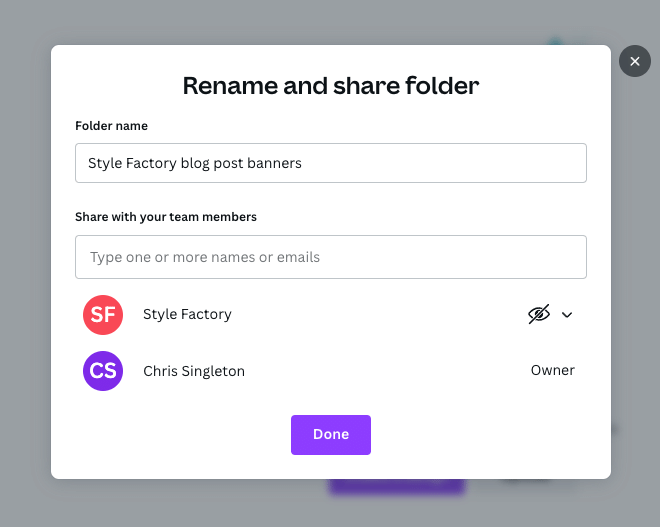
One thing you’ll need to note here is that to share a folder with a team member, you have to create a ‘team’ in Canva first.
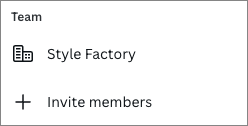
The ‘Canva for Teams’ plan gives you 5 user accounts by default, with additional charges applying when you add more team member accounts to your plan.
(More details on Canva pricing in a moment!).
Can you back up a Canva project?
Although Canva uses traditional files and a folder-based approach to organizing your design, it’s important to note that there isn’t really a way to back up your projects using the platform.
You can recover deleted files for a set period — after deleting a design, it’s kept in a trash folder for 30 days before being permanently deleted (if you delete a team, that team and its content can be recovered for up to 14 days).
While these grace periods are welcome, they’re no substitute for being able to back up your projects to a device and reimport them in the event of accidental deletion of a project (or loss of access to a Canva account).
Yes, you can export your files to PNGs, JPGs, etc. — but these will flatten all the layers in your design, meaning that when you re-import them to Canva, they’re no longer editable.
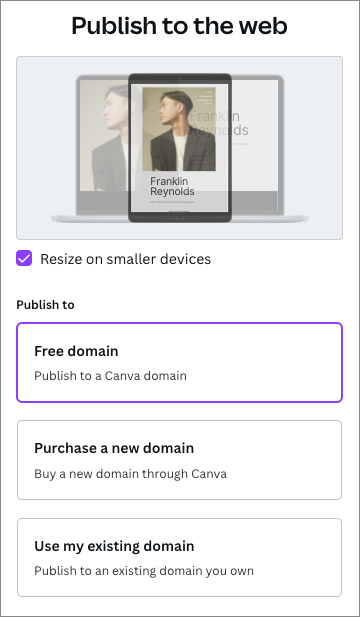
Building a website with Canva
In addition to being able to create visual assets with Canva, you can use it to build websites too.
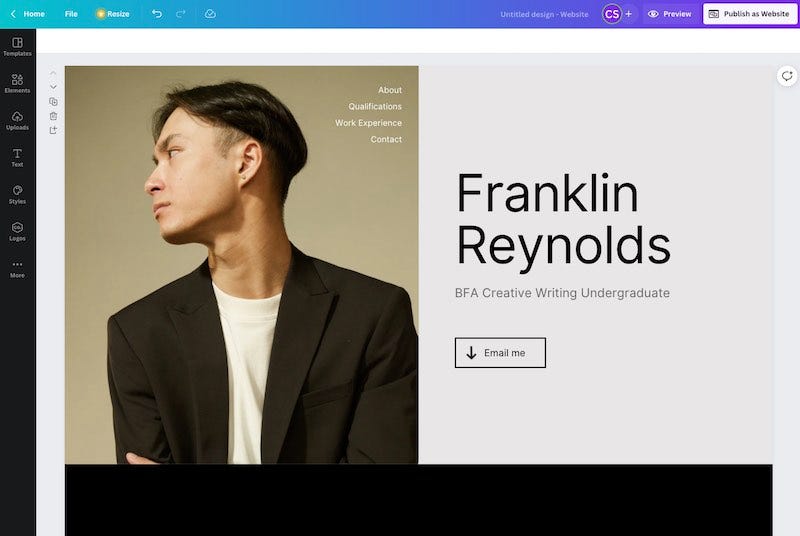
It has to be said however that only very simple websites can be created with the platform — you can build a one-page site ‘brochure’ site with Canva, but that’s about it. The sites that you can make with Canva look very professional and on-brand, but you can forget about incorporating things like a complex navigation structure or eCommerce into them.
Simply put, although you can create a simple online presence with Canva, it doesn’t give you the sort of professional website building features that site builders like Shopify and Squarespace provide.
The site designer might be appropriate for some users’ needs, however — if all you need is a basic resume site with some copy and a few pictures, it’ll do the job fine.
When you’ve created your site, you can either publish it to a free Canva site address (yoursitename.my.canva.site), purchase a new domain for it through Canva (using the desktop version only), or map it to a domain you already own.
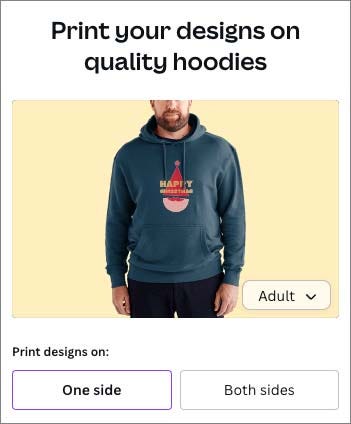
Making products with Canva
Another interesting aspect of Canva is the fact that you can actually manufacture physical products using the platform.
To do this, you go to its ‘Print products’ section, where a wide range of items — everything from postcards to hoodies to business cards — can be designed and purchased.
In a lot of cases, I’d definitely view Canva’s product manufacturing option as a ‘nice to have’ feature rather than a core one, however.
First, all the products available are quite expensive, meaning that you can’t really make something, mark up on it, and sell it to somebody else. The cost price of a t-shirt is around $25, for example.
Second, the number you can order at once is capped — when testing the feature, any item I tried to manufacture was limited to 50 copies. This makes the option unsuitable for anyone wishing to mass produce items.
Apps and integrations
Like a lot of other SaaS (software as a service) products, Canva provides a range of apps and integrations that add functionality or help it integrate more neatly with other popular services.
At the time of writing, 108 are currently available, which you’ll find in its ‘app directory,’ pictured below.
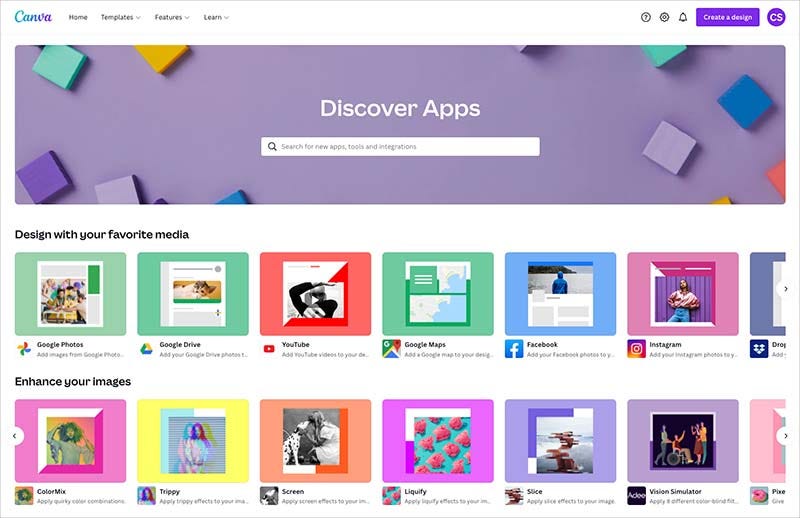
The apps on offer generally are to do with adding special effects to your images or retouching them.
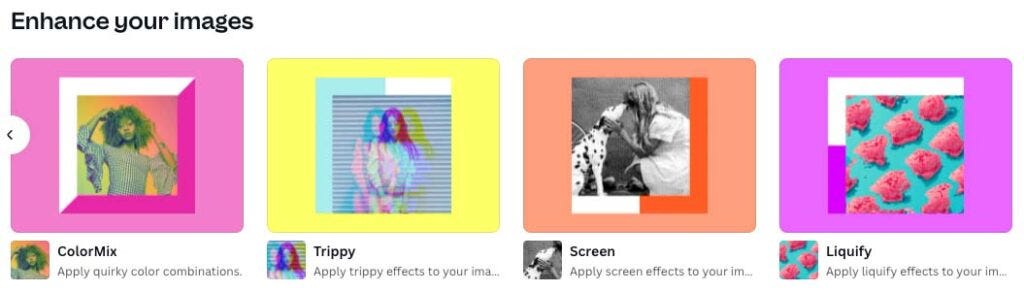
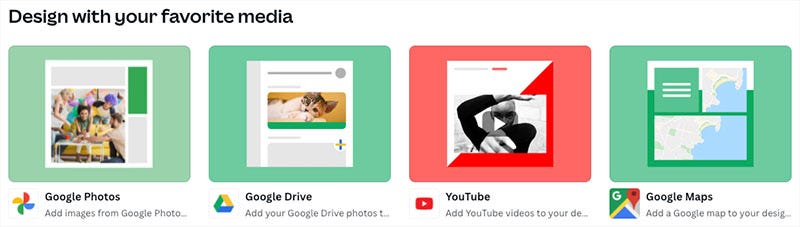
The integrations available generally help you import images or videos from other apps into Canva. For example, you can connect your Canva account to services like Google Photos, YouTube, Facebook, and Google Maps and bring content in from them (which you can then incorporate into your designs).
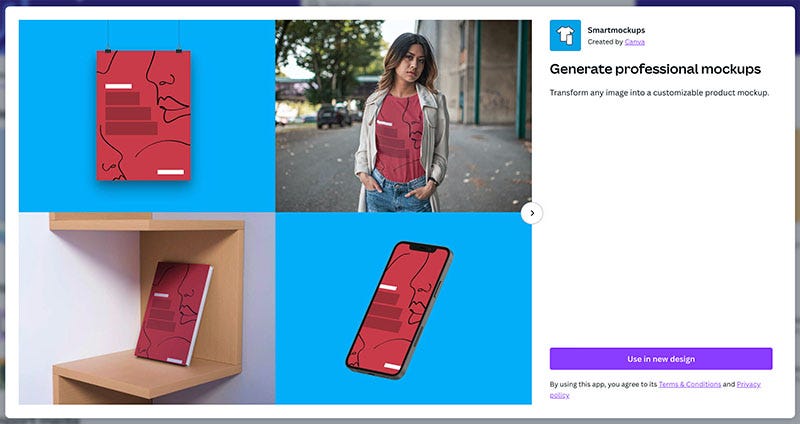
A particularly useful app for many users will be the ‘Smartmockups’ one. This lets you see how your design will look in the context of the ‘real world’ — for example on a book cover, in a picture frame, in a smartphone, etc.; it can serve as a built-in alternative to the similar ‘PlaceIt’ mockup generator.
A Microsoft Powerpoint app that lets you export your Canva projects easily into PPT format is also worth a mention — this will come in handy for a lot of Microsoft 365 users.
Oddly, however, I couldn’t find any Canva apps for the leading website builders, like WordPress, Wix, Squarespace, and Shopify. These are all services that could possibly benefit from integration with Canva because it is so good for producing web graphics and blog banners.
If the apps on offer aren’t enough for you, you could always consider building your own — a developer’s platform for Canva provides access to the platform’s API and lets you create your own ‘content extensions’ that let you integrate Canva with other tools in various ways. (Obviously, you’ll need the development skills to do this.)
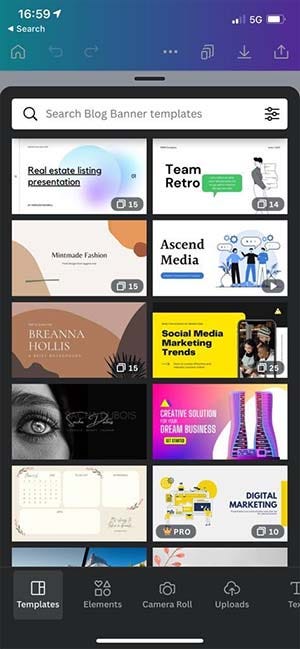
Using Canva on mobile phones
As you’ll have noticed from the screenshots on this post, I’ve largely based this Canva review on the browser-based version of the app (for the record, the desktop versions for Mac OS and Windows are very similar to this).
You can however also use Canva on a mobile device, thanks to iOS and Android apps that are available for the platform.
These actually score exceptionally high on the Apple and Google Play app stores (4.9 and 4.8 respectively); these ratings are the highest I’ve seen for any mobile app for a SaaS product that we’ve reviewed.
And, having had a play around with the iOS version of Canva, I can see why the mobile apps are so popular with their users. The mobile version I tested was really easy to use, with an interface that was very similar in nature to the desktop version (albeit squashed down a bit!).
And we are not talking about a cut-down version of the platform here; you can do serious work with Canva on a smartphone.
That said, I’d still be inclined to use the browser or desktop-based version of Canva wherever possible: editing photos and videos on a phone is rather fiddly and I don’t enjoy doing that much!
But for people who are on the move and want to put together a slick-looking video for social media platforms really quickly, Canva’s mobile apps are an excellent option.
Customer support
There are two ways to avail of customer support from Canva.
First, there’s the Canva help center, which contains a searchable archive of help resources and how-to guides.
There’s also email support. The form for this is easy to access — with some other online apps, you don’t get to see contact details until you’ve searched a help center for a solution to your problem first, but Canva makes them very easy to find (googling ‘contact Canva support’ should sort you out pretty quickly).

In terms of turnaround times for support queries, these vary according to plan:
- Canva Pro — within 24 hours
- Canva for Teams — within 2 hours
- Print — within 24 hours
- Nonprofit and Education — within 48 hours
- Canva Free — 1 week
It’s a shame that phone or live support isn’t available, but the fact that users of the Canva free plan get support is commendable, and given the low pricing point of Canva, it’s fairly understandable that customer service is email-only.
And speaking of pricing…
Pricing and value for money
So far, we’ve looked at all the key features of Canva; but not it's pricing. Let’s dive into that now.
Canva pricing plans
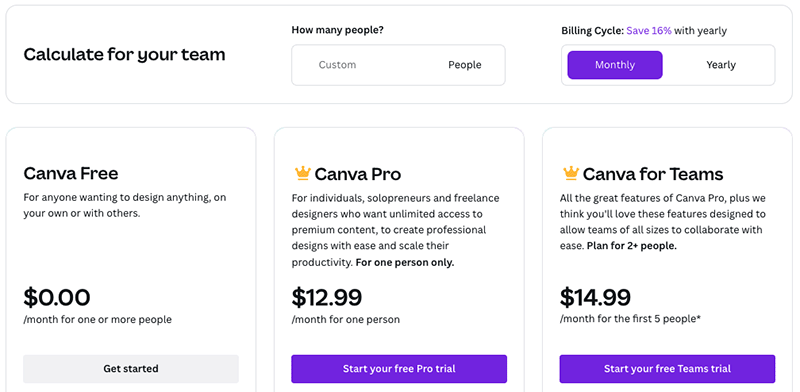
There are three main versions of Canva to consider:
- Canva Free — $0 per month
- Canva Pro — $12.99 per month (for one user)
- Canva for Teams — Variable pricing (starting at $14.99 per month for up to 5 users)
If you pay for your Canva plan on an annual basis, a discount of 16% is applied.
Subject to a vetting process, free or discounted plans are provided to educational organizations; and non-profits can use Canva for free.
In terms of the differences between these three plans, the key things to watch out for are as follows:
- Seats — the number of users varies by plan, with the free plan and Canva Pro both providing just one user account and the ‘Canva for Teams’ plan letting you purchase multiple seats.
- Templates — the paid-for plans give you considerably more templates than the free ones. You get a whopping 610,000 templates to play with on the ‘Canva Pro’ and ‘Canva for Teams' plans (but you still get access to a very generous 250,000 free templates on the $0 plan).
- Images and videos — the paid-for plans give you access to over 100+ million stock photos, videos, and graphics; the free plan gives you a large range of photos and graphics (‘hundreds of thousands,’ according to Canva), but no videos.
- Brand kits — if you want to use your own brand colors and fonts easily in Canva, you’ll need to be on a paid-for plan. On the ‘Pro’ plan, you can create up to 100 Brand kits; on the ‘Canva for Teams’ plan, the limit is 300.
- Storage space — the free plan gives you 5GB of cloud storage; the ‘Pro’ plan provides 1TB; and on the ‘Canva for Teams’ plan, you get 1TB per user.
- Transparent backgrounds — if you want to output a design with a transparent background, you’ll need to be on a premium plan.
- User controls — only the ‘Canva for Teams’ plan provides controls over what can be uploaded to or edited in Canva.
- Support — as discussed above, response times are quicker if you’re on a pro version of Canva (with the turnaround time for queries being considerably quicker on the ‘Canva for Teams’ plan).
Value for money
There’s no doubt about it: Canva offers you a lot of bang for your buck.
For a relatively small monthly fee, you can enjoy access to a wide range of design tools and visual assets that let you create extremely professional results, extremely quickly.
Not just you, necessarily — 5 seats are included by default on a $14.99 ‘Canva for Teams’ account. By any stretch, this represents very good value, particularly for small business owners on low budgets.
And, when you consider that a monthly fee of $12.99 to $14.99 is often less than what you’d pay for just one stock photo from Getty or iStock, but gives you access to millions of stock images and videos, this sense of value for money becomes even more pronounced.
It’s worth pointing out however that oddly, Canva becomes more expensive on a per-user basis if you purchase more accounts (the reverse is often the case with other apps). For example, if you have 5 users in your Canva account, the average monthly fee per user is just $2.99. But if you increase the number of users to 50, the per-user price rises to $12.85 per user.
Even so, you need to remember that many business apps requiring a monthly subscription typically cost a lot more than Canva — the SEO apps we review, for example, typically range from $99 to $400 per month in price and come with extremely small seat counts. So despite Canva’s slightly strange approach to seat pricing, I’m still struggling to think of any product that we’ve reviewed to date that offers quite so much functionality for such a low price.
Canva review conclusion
Overall, Canva is a really solid, easy-to-use app that is packed with features that make designing visual assets simple. Whilst not always a substitute for a professional graphic design tool or video editing application, it is considerably easier to use than such tools, and in many contexts will do the job just as well as them (and more cheaply, too).
The main downsides of Canva are the fact that its output formats are limited; there’s no way to back up projects, and support is email-only. Of those three flaws, the output formats issue is the most significant, as it limits your ability to start a design in Canva and have it finished off by a professional designer in another app. But given how cheap Canva is, it’s hard to feel too annoyed by these omissions.
I’ll leave you with a summary of the key pros and cons of Canva, and you’ll also find some information on some alternative tools below.
Our overall rating: 4.6 / 5
Key pros and cons of Canva
Pros of using Canva
- It’s extremely good value — for a very small monthly fee you and several other users can get access to a host of design tools and millions of bundled graphics, photos, and videos.
- The Canva features are extremely easy to use, even if you don’t have any graphic design skills.
- The free plan is very usable and even comes with support.
- Its brand kit option and the way it lets you upload your own photos and typefaces make it easy to ensure brand consistency across designs produced in Canva.
- It provides a fantastic way not just to create promotional material, but, thanks to its graphic features, and statistics too.
- If you’re on a ‘Canva for Teams’ plan, you’ll find that Canva makes it extremely easy to collaborate on designs.
- Its ‘Magic Resize tool’ makes it extremely easy to create lots of visual assets at once.
- Canva’s mobile app is extremely functional and is particularly good for creating ‘on-the-go’ visuals for social media marketing purposes.
- It provides an easy way to produce one-off printed items.
TRY CANVA FREE >
Cons of using Canva
- The formats you can output your visuals to are quite limited, with the lack of an ‘export to PSD’ option being a particular concern.
- Canva is an online graphic design tool — so if you don’t have Internet access, you won’t be able to work on any of your designs.
- There’s no obvious way to back up your projects.
- There’s no phone support.
- The range of apps and integrations provided is fairly limited.
- The free version, while generally very useful, doesn’t let you export images with transparent backgrounds.
LEARN MORE ABOUT CANVA >
To fund our research and testing, this post contains affiliate links.


0 Comments